Showing posts with label Ribbon. Show all posts

Wednesday, 6 May 2015

Is it a bird? Is it a plane? Nope, it's ........

.... my weekly post for Incy Wincy DesignsIt's new challenge time and this week we're helping our crafty friends in the US and Canada spoil their Mum as our challenge this week is Mom's the Word


We're being sponsored this week by the very lovely Heather Valentin from Lacy Sunshine who is offering a prize of 3 of her gorgeous digis to our lucky prizewinner! Heather also very kindly gave each DT member their choice of image to use for this challenge. Back to the post title then ... Is it a bird? Is it a plane? Nope, it's Glitter Girl Superhero - perfect for all those superhero Mums out there!!!!!!!


Now I'm in a bit of a pickle - firstly, my Mum is no longer with us and secondly we've already celebrated Mothering Sunday here in the UK .... so I've just gone for a very "girly" card in the hopes that it inspires you to make a creation for your Mum/Mom!


My card recipe is as follows:

  • Card Base - is a pre-made white card base, around 14.7cm square
  • Papers - the Paisley Print paper is from a set by Summer at Summertime Designs called Angel Mother. The lovely Medium Pink glitter paper comes from a set at Pixel Scrapper Digital Scrapbooking called Glitters by Dreamn4ever Designs - I think this set must be retired now, as I can't find it on the site. I've digitally added a brown border to both papers to give a faux mat and layer.
  • Image - this very sparkly one is called G3 Glitter Girl Superhero and she comes from the pen of Heather at Lacy Sunshine Stamps. I've brought her to life using my Spectrum Noir Pens in the listed colours before die cutting her using one of my Sizzix Framelits Ovals
    • Skin - FS2, FS3, FS6, EB5, DR7
    • Eyes - GB10 DG2, Blender Pen
    • Hair - GB8, GB10, EB5, EB8
    • Clothes - PP4, PP5, PP6, DG2, DG3, DG4, DR1, DR3, Silver Gel Pen, GB3, GB4
    • Bag and Boots - PP1, PP3, Silver Gel Pen
    • Glitter Cascade - Silver Gel Pen, White Glitter
  • Sentiment - is by my favourite sentiment designer, Paulette at Create with TLC and was diecut using a die from my Die'sire Essential Rectangles set. Some "bling" in opposing corners finished this off.
  • Ribbon and button - are from my stash and both came from separate "bargain grab bags" from Hobbycraft some time ago. I've attached the button to the bow by way of some silver thread from my (languishing) lacemaking stash!

I'm not 100% happy with this card (hence why I'm a bit late joining in with this week's challenge), but it's done now! I hope you'll come over to Incy Wincy Designs and check out the fabulous creations by my lovely teamies, and while you're there please give Judy (our newest teamie) a warm welcome. Then come back and show us your creations for Mom/Mum. This challenge closes on Sunday 10th May.


I would like to enter this card into the following challenges:

If, like us, you're suffering with strong winds and heavy rain showers I hope you stay safe! And if you're celebrating Mother's Day this weekend, I hope you get spoilt by your loved ones!

Have a great week!

Hugs, Helen x

Friday, 25 April 2014

Pretty in Pink

... or perhaps this post should read "Pretty Pink"!

I'm sooooooo sorry - I'd scheduled this post, but naughty Blogger hasn't posted it! "Hanging head in shame here cos it means this post is late :o( Hope this post finds you well. Yesterday was my first day back at work after the Easter break and boy, what a day it was. I came down from my holiday cloud with a bump yesterday morning!


This is my last post as a Guest Designer for Delicious Doodles :o( - very sad face being worn here! The month of April has flown by, and I would like to thank Teri and her Design Teams for having me this month - I have had a blast!!!!!! I hope that the Guest Designers for May have as much fun creating with Teri's images as I have had!


If you read last week's post at Delicious Doodles, you'll know that we're raising Breast Cancer Awareness and this week we'd love to see your creations that are Pink and Girly!


Teri again opened the doors to the Delicious Doodles Shop and allowed me to choose some digis to show you this week, so here goes with my second "pink" card (although I'm not sure it's 100% girly!):


This will be another card for the box of cards I'm making as a raffle prize for the Shades Charity Ball that my friend Karen is organising in October - the proceeds from this will go to MacMillan Cancer Support.


My card recipe is as follows:
  • Card base - is Centura Pearl in Snow White Silver which I have cut, scored and folded to make a 16cm square card. 
  • Design Papers - are both part of the April "Blog Train" at Pixel Scrapper Digital Scrapbooking. The pink leaves paper is by Whispy Willow Lane, and the white paper with the floral and flourish border is by Designs by Magnolia. As usual, I resized the papers to my requirements using my word processing package, and digitally put a faux mat and layer around them in a rich pink colour.
  • Image - is by Teri at Delicious Doodles and it is the utterly gorgeous Celtic Fairy and I have brought her to life using my Spectrum Noir Pens in the following colours (click on the pic to supersize it, and check out the sparkly pink hair and wings!):
    • Hair - BP2, BP3, BP4, BP5, White Glitter
    • Skin - FS2, FS3, PP3, BP2
    • Jewellery - Silver Gel Pen
    • Dress - BP1, Colourless Blender
    • Wings - BP1, Silver Gel Pen, White Glitter
    • Outline - BT1
  • Sentiment - is by Teri at Delicious Doodles and it is the heart from the Awareness Ribbon Set. The ribbon set is a freebie (thanks to Teri's generosity), so why not treat yourself to another digi as well .... 2 for the price of 1! I imported the heart into my word processing package three times, and lined up a text box over each heart to write the sentiment. I then coloured these using my Spectrum Noir Pens in colours BP1, BP5, BP7 and Colourless Blender, trying to get an ombre effect!
  • Ribbon - is recycled from, I think, a toiletries package. It's been lurking around for a while, and I think this is the perfect project for it!
  • Buttons - are from  a "grab bag" of mixed bright buttons I picked up at Hobbycraft a few months ago.


I hope you'll come over to the Delicious Doodles Challenge Blog and enjoy the wonderful Pink and Girly creations from Teri's talented Design Team and my fellow guests. Don't forget to then come back and show us your creations - you don't need to use a Delicious Doodles image to enter the challenge but if you do, you get a second entry in the draw to win 5 of Teri's images AND your work may be Spotlighted on the challenge blog! This challenge will end on Thursday 1st May 2014 at 6pm BST (UK time!) 


I would like to enter this card into the following challenge:
  • Bingo at Catch the Bug - I've chosen the far middle vertical line of Hot Pink, Players Choice (Glitter and Button) and Recycled Item (Pink Ribbon was part of the wrapping on some toiletries)
  • Challenge #208 - Square Cards at Robyn's Fetish
  • White + 1 at Papertake Weekly
  • Monday Challenge #134 - Shake it On! at My Craft Spot
  • Sparkle! at Crafty Boots Challenge
  • Favourite Item to Recycle and Why at As You Like It - Oh ladies! I am sooooo with Annette .... ribbons are my favourite item to recycle. You get them in all types (satin, grosgrain, sheer, printed) on various purchases and gifts. The one in this project came from a gift pack of toiletries, but I also save them from clothes, presents (as part of the gift wrap) and even from an enamel jug of flowers (the flowers have died, the jug now holds some fake blooms, and the ribbon's in my stash!!!!)

That's it from me today - hope you all have a great weekend!

Hugs, Helen x

Tuesday, 25 March 2014

Prima Ballerina

Good Morning my lovely friends and we're already in a new week! I had planned to write and schede this post before the weekend as I was doing some celebrating, but I got waylaid ... another 40-harummph birthday, but who's counting!!!!!! 


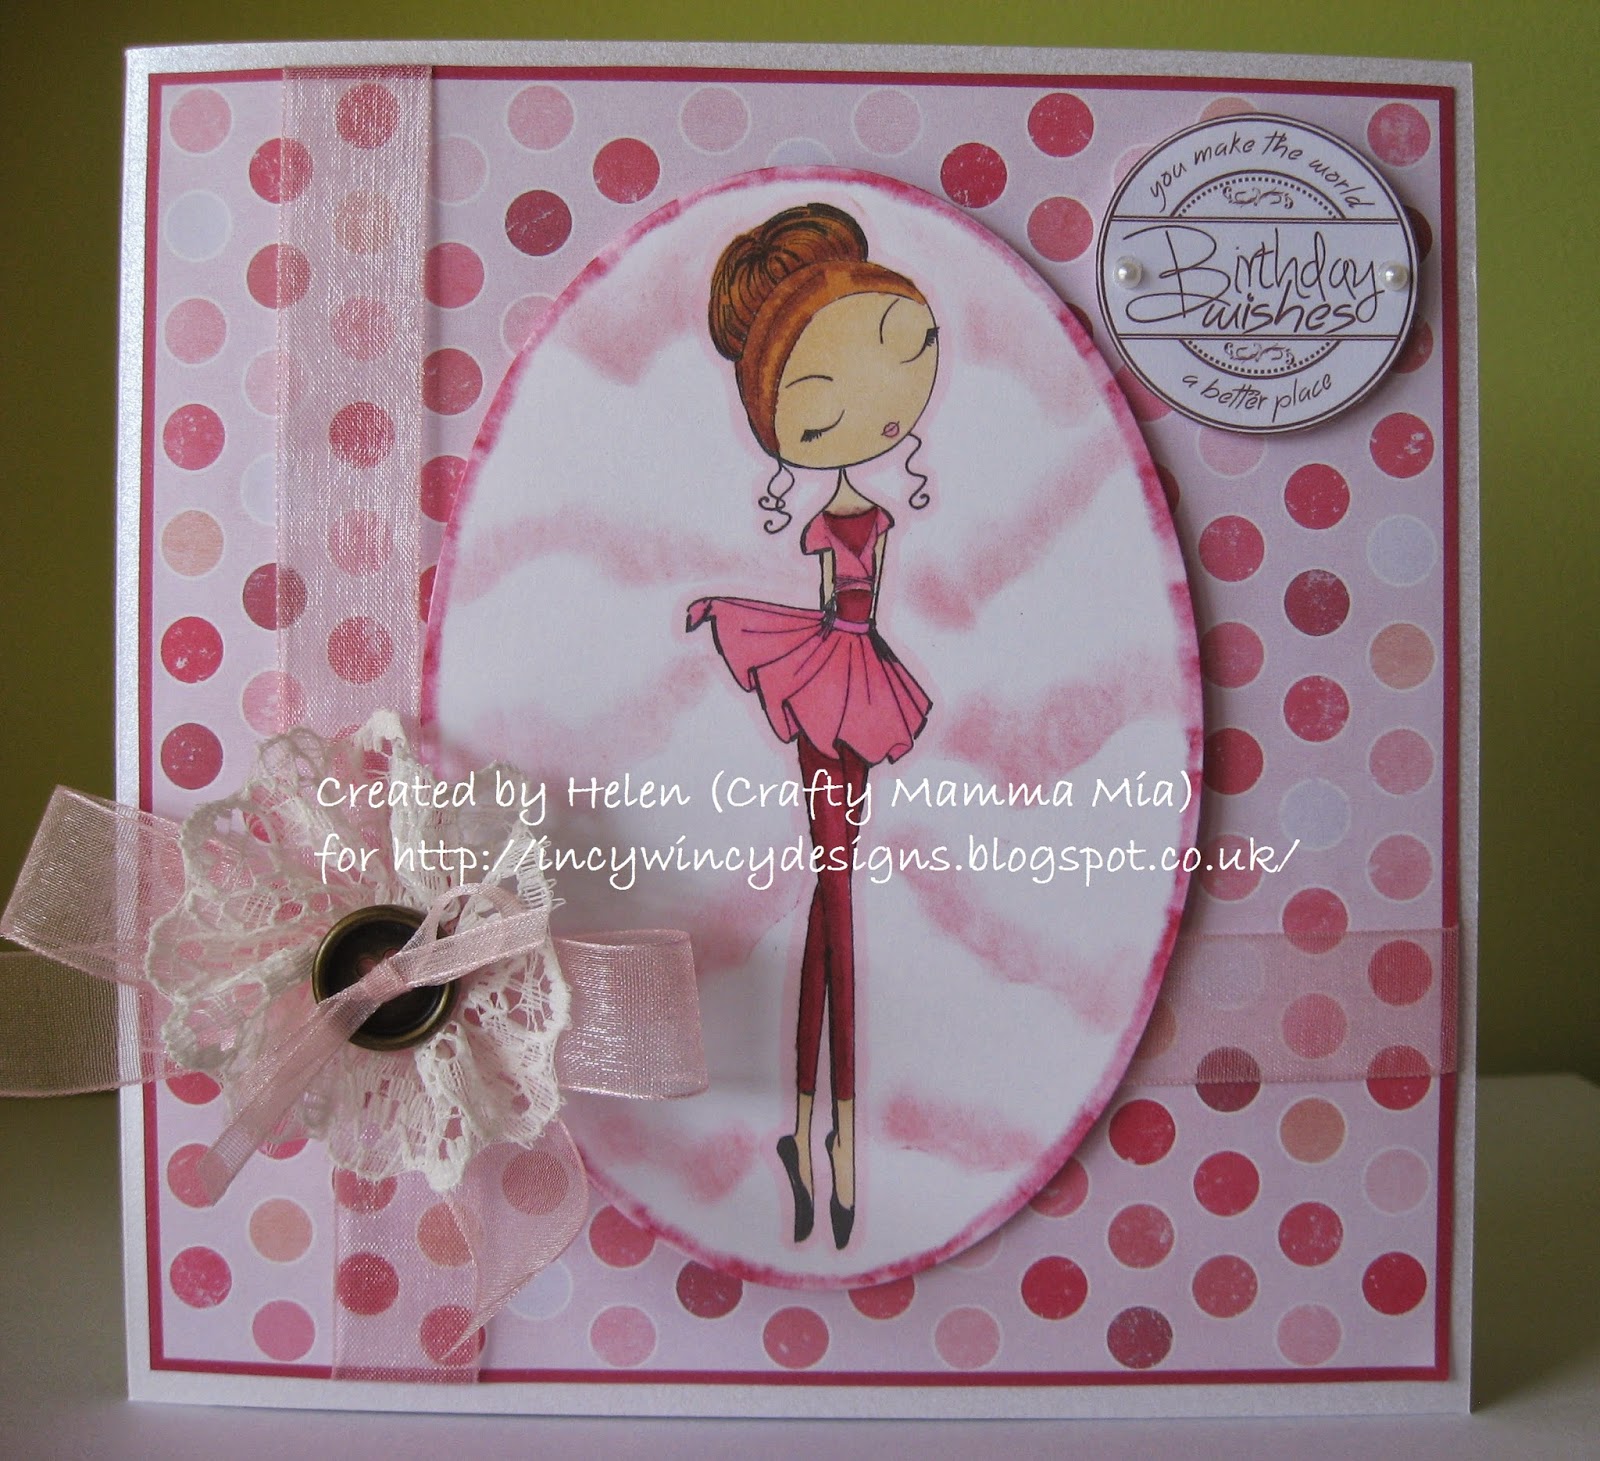
Anyway, we've got another new challenge at Incy Wincy Designs and this week we're going all girly as your creations need to feature Ribbons, Lace and Pearls. 


We have 2 amazing sponsors this week which means we are able to offer a great prize to 2 lucky winners!


Our first sponsor is the lovely team at The Paper Shelter who are kindly offering our first lucky winner a $20 Gift Certificate to their store. Don't forget that with every image you buy from The Paper Shelter you don't
just get the black and white line drawing; you get a coloured image, Design Paper, and a complete composition for when you really need that card in a hurry - OK, we all know we sometimes have those times!!!!! Normally for me at 8am when my girls remember it's so-and-so's birthday today - can you make a card Mum? :o)


Our second sponsor is a new one for Incy Wincy and it's Wendy from All Dressed Up. Wendy is offering our second lucky winner 2 digital images from her store. Here's a little bit about Wendy:
Hi I am Wendy Burns I live in Nottingham UK with my husband and two children who have been the inspiration behind the characters,  in particular my daughter who has kept me up-to-date with blogging and trends.  I work predominantly within the textile children’s wear market, fashion and interiors.
I trained as a textile designer and although my work is digital based, I love to retain that hand drawn /sewn feel which I hope comes across in my artwork.
Digital stamps is a new challenge for me and the opportunity to work with the All Dressed Up Team and has been very exciting, in particular the creative way my characters have been given individual personalities by the designers .
All Dressed Up is a newly launched blog with an enthusiastic team who are passionate about stamping.  The coordinators Marilyn and Tracy along with an amazing design team are also known as The Dressy Girls.
We have a friendly Facebook page, regular blog posts, tutorials, challenges and freebies .The stamps can be purchased from the Etsy shop which is updated on a monthly basis.
We really are friendly bunch and would love to see your creations so please feel free to contact us and visit the All Dressed Up Challenge Blog.


The DT have been really lucky as both our sponsors have very kindly supplied us with images to use for our inspiration projects for this challenge. I have used an All Dressed Up image for my card which I made for one of my dear friends who celebrates her birthday next week - I think I'm safe in posting this now 'cos I don't think she peeks at my blog!


My card recipe is as follows:
  • Card Base - is Centura Pearl in Snow White Silver which I have cut, scored and folded to make a 15cm square card.
  • Design Paper - is by Marisa Lerin at Pixel Scrapper Digital Scrapbooking and it is called Polka Dots 21 Paper Pink (from her Vietnam Papers Kit #3. The colours in it resemble the small girls I see running around in their leotards and tutus, getting ready for a ballet class in the community facilities at work! As usual, I digitally sized this paper in my word processing programme before putting a raspberry coloured border round it to give a faux mat layer.
  • Image - this dancing diva is called Love to Dance and she comes from the pen of Wendy all All Dressed Up. This girl also comes with a lovely polka dot heart and her own sentiment, neither of which I've used on this card. I brought her to life with my Spectrum Noir Pens in the following colours
    before die cutting it with my largest Framelits Oval Die:
    • Hair - TN6, TN7, TN8
    • Skin - FS2, FS3, CR4
    • Leotard & Leggings - DR6, DR7
    • Wrap & Tutu - PP5, PP6
    • Trousers - DR5, DR6, DR7
    • Ballet Shoes - Already printed in Black
    • Outline - PP1
    • Background - Craf-T Chalk in Pink
    • Edge Distressing - DR6, Colourless Blender
  • Sentiment - is a freebie by my lovely blogging friend Annette, and I have to confess this is one of my faves (I know I only used it a couple of weeks ago!). I recoloured this to a similar raspberry shade as my faux mat using my word processing programme before adding a couple of pearls from my stash to it.
  • Ribbon - is pale pink sheer organza in 2 widths which I think came from a local haberdashery store. The wider ribbon is layered both ways in an offset cross shape and I have also used it to make a bow under the lace flower. The narrow ribbon runs under the cross of wider ribbon and through both the lace flower and button before being tied in a bow.
  • Lace - is from the same haberdashery store and I have sewn running stitch along a length of it and then gathered it into a flower shape. I was busy making this whilst waiting for youngest to get changed after her swimming class at the weekend when a lady came up to me and said that she'd been watching me make it and how intricate and delicate it was! Yet they really are soooooo simple to make :o)
  • Metal Button - was rescued (sorry, I mean recycled!) from a lovely pair of trousers that my eldest grew out of and it's been sitting in my crafty stash, just waiting to be used!

So that's my card featuring Ribbons, Lace and Pearls - I hope you'll come over to Incy Wincy Designs and take a peek at the other gorgeous creations by my very talented team-mates, before you share your creations with us! This challenge will end on Sunday 30th March 2014.


I would like to enter this card into the following challenges:

Hope you have a good week!

Hugs, Helen x

Monday, 17 February 2014

Handbags and Gladrags

This is my second post of the day - please scroll down to see my first post

Hello again friends,


It's new challenge time at Incy Wincy Designs and this one definitely challenged us on the DT. Chris chose this lovely bag as our Photo Inspiration. 


Our wonderful sponsor for this challenge is Teri at Delicious Doodles who is very kindly offering this week's lucky winner 4 digital images of their choice, and with such a varied range of images on her site there is definitely something for everyone! Teri has also kindly given the DT some of her gorgeous images to showcase this week, although I'm using an image which I chose as part of my winning package at the Delicious Doodles Challenge Blog in May last year.


Mr Mojo exercised his over-active imagination (once again!) and here is my card for you featuring one of Teri's "delicious" images:


My card recipe is as follows:

  • Card Base - is Centura Pearl in Ivory. I used my Ultimate Pro (and the instructions on The Ultimate Pro DVD!) to cut, score and fold the cardstock to make a 21cm x 10cm handbag card, before using one of the wavy shapes built into the Ultimate Pro to emboss borders (which look similar to the fairy's amulet) onto the card. This handbag card is a new fold for me, and it went together so well, I'm sure I'll be making more!
  • Design Papers - are from a set called At the Beach - Distressed Chipboard Styles by DigiTee Designs (available from Best Free Digital Scrapbook - thanks to my Incy Wincy Teamie Jenny for her tip-off about this site!). I have used them in the brown, orange, tan and teal colourways and, with the help of my word processing programme, turned them into blocks, to resemble the blocks on the bag in the photo. I copied and pasted the block design twice, before printing it, fussy cutting it and adding it to the bottom of the card.
  • Image - is called Steampunk Fairy and she comes from the pen of Teri at Delicious Doodles. I've not tried steampunk before, and I'm not sure if I've got it quite right, but this gorgeous girl was brought to life (with the assistance of Teri's wonderful shading as a guide) using my Spectrum Noir Pens in the following colours before I tool distressed the edges:
    • Skin - FS7, FS9, CR5
    • Hair - EB6, EB7, EB8
    • Dress - TN5, TN6, TN7
    • Wings - BT5, BT6, Bronze & Gold Gel Pens
    • Jewellery - Bronze & Gold Gel Pens
    • Outline - BT1
  • Ribbon - recycled from a box of toiletries I received at Christmas, and nearly a perfect match!
  • Gems - from my stash

If you'd like more inspiration, head over to Incy Wincy Designs and check out how the rest of the DT girls have been inspired by this photo. Don't forget to come back and show us your wonderful Photo Inspired creations - this challenge will end on Sunday 23rd February 2014.


I would like to enter this card into the following challenges:

Hope you have a great week!
Hugs, Helen x
Mmmmmm ... Chocolate and Cream

This is my first post of the day - please scroll up to see my second post

Hello friends,

It's half term here at Casa Mia ... whoo hoo!!!! We've got a week of not-a-lot planned, well I'm hoping to get in a fair bit of crafting but we'll see what the minor folk at Casa Mia have planned for me :o) Hope you're all staying safe in the wind and rain. I'd also like to welcome my newest follower - thanks for joining the rest of us on our journey through my crafting.

It's new challenge time at Lexi's Creations and this one may challenge Mr Mojo as it's Monochrome. It doesn't have to be just black and white though; you can choose any colour scheme you like, as long as you only use shades of that colour.


Joanna Sheen
Our wonderful sponsors for this challenge are the fabby team over at Joanna Sheen who are offering our lucky winner a £10 Gift Voucher to their on-line store. And with postage and packing free if you spend over £9 everyone's a winner if you buy in this Aladdin's cave! This is the last time that Joanna and her team will be sponsoring us for a while :o( - thanks for all your support ladies!


The lovely Lexi has once again let the DT loose in Fairy Dust Crafts (thanks Lexi!) and by the way, there's a sale on there so do go and have a look! Here is my card for you featuring one of Lexi's sweet images:


My card recipe is as follows:

  • Card Base - is Centura Pearl Ivory which I have cut, scored and folded to make a 15cm square card
  • Design Papers - are from a collection called Chocolate Chip and Cream Delight by Debbie at The
    Crafty Pad Designs (available from Card Making Downloads). I have used 2 different papers from the set which I sized in my word processing programme and then put a chocolate brown border around them to give a faux mat.
  • Image - is called Hot Chocolate Scruffles and he comes from the pen of Lexi at Fairy Dust Crafts. This cute, and messy!, dog was die cut using the largest Framelits Fancy Labels die, before being brought to life using my Spectrum Noir Pens (thank goodness my collection was completed with the arrival of my Darks pack last week!) in the following colours:
    • Fur - EB3, EB4, EB5
    • Marshmallows - EB1, EB2
    • Cream - EB1, Colourless Blender
    • Cup & Saucer - EB6 which I dotted to make a pattern, EB7, EB8
  • Sentiment - is by Paulette at Create with TLC and this was a blog freebie in November 2011. I took this into my word processing package and put the same chocolate coloured border around it to make a faux mat
  • Ribbon - a recent "grab bag" purchase (15 different ribbons, each 3 metres in length for £5) from Hobbycraft which I can't find, unfortunately, on their website :o(
  • Gems - from my stash

If you're short of inspiration on this challenge, do come over to Lexi's Creations and see the other wonderful creations by my teamies, our regular Guest Designer Silvi and this week's special Guest Designer Janny. Don't forget to come back and show us your wonderful Monochromatic creations - this challenge will end on Saturday 1st March 2014.


I would like to enter this card into the following challenges:


Hope you have a great week!
Hugs, Helen x

Monday, 9 December 2013

A Snowy Forest

Good morning friends - hope this post finds you well. Now please can someone shed some light on where last week disappeared to? I can't believe how quickly the weeks are going by!

It's new challenge time it's new challenge time at Incy Wincy Designs and this week we want to see more of your Christmas creations as our theme this week is Christmas - Let It Snow!

Again this week, we've got 2 amazing sponsors offering our lucky winners prizes!

Firstly we've got this gorgeous bundle of charms from Iva Nova Chest ... I have to confess that as soon as us DT girls saw this prize, we all threatened to resign en masse as we would all dearly love to win this!!!!


Our second sponsor is own very own Teamie Nikki who owns Limited Runs Digital Stamps. Nikki is offering our second lucky prize winner 3 digis from her store.


Nikki was also kind enough to let us all loose in her on-line store and each DT member had their own choice of which digi to use - thanks Nikki!!!! :o)


So here is my snowy card:


My card recipe is as follows:

  • Base Card - made from Centura Pearl in Snow White, which I cut, scored and folded to make a 10.5cm x 14.7cm card.
  • Design Paper - is a members download from Club Inspire section of the Crafter's Companion website. This freebie was released in November 2010 and is called Festive Florals. I have digitally matted my papers with a dark blue border using my word processing programme.
  • Image - is Pine Forest by Nikki of Limited Runs Stamps which I brought to life using my Craf-T Chalks in the following colours before giving everything a very liberal coating of white glitter!:
    • Trees - Dark Green, Light Brown, Dark Brown
    • Snow - Grey
    • Sky - Turquoise
  • Sentiment -  comes from Paulette at Create with TLC  and this was part of the 2011 Christmas Club.
  • Ribbon - from my stash
  • Snowflakes - punched from Centura Pearl in Snow White using my largest snowflkae punch. I bent up the fronds to give them a bit of dimension.


I hope you'll come over to Incy Wincy Designs and see the wonderful snowy creations by my teamies, our December Guest Designer Sue and our former teamie Annette, who's joining us this week.  Don't forget to come back and share your Christmas - Let it Snow  creations with us - this challenge ends on Sunday 15/12/2013.

I would like to enter this card into the following challenge:


Hugs, Helen x

Monday, 4 November 2013

Away with the fishes ... ?

Good morning friends - hope you are well and stayed safe in last Monday's stormy weather.

The Half Term holidays have come (... and gone!), and I'm back to school today. Scary to think that the next time I'll get some time off is the Christmas Holidays. Eeeeeeeekkkkkkk!!!!!!!!!!!!!!!!! Eldest came home from New York safely on Friday - she had an amazing time but was absolutely pooped and slept for 14 hours that night! They only had a delay of an hour flying out which wasn't due to the weather at all, but a medical emergency who had be evacuated from the flight and "de-bagged". I think she's smitten with NYC, and would love to return.


It being a Monday morning, it's time for a new challenge time at Incy Wincy Designs, and this week our challenge is for you to use Ribbon, Twine or Fibres. Our sponsors this week are Lindsay and her lovely team from Sassy Studio Designs who are giving this week's lucky winner 4 Digital Images!


Lindsay has also kindly given us some images to "play with" this week (thank you!), and here is my card for you:


Hmmmmm ... this looks like another photo "di-sas-ter". Will get a better shot during daylight hours and post it!

My card recipe is follows:


  • Base Card - is Centura Pearl in Ivory which I cut, scored and folded to make a 15cm square card.
  • Design Papers - are from a kit called She Sells Sea Shells by Summer at Summertime Designs
  • Image - this very surprised youngster is called Little Honeys - The Little Mermaid and she comes from the pen of Lindsay at Sassy Studio Designs. My Little Mermaid was brought to life using my Spectrum Noir Pens in the listed colours before being fussy cut:
    • Hair - GB7,GB8,GB10, CR4, CR5, CR6 (I'm still not sure that I've got the 'light shine' in hair right, but I'll keep trying!)
    • Skin - FS2, FS3, CR5, BT4
    • Shell Bikini - CR5, CR6
    • Fin - BT4, BT5, BT6
    • Outline - BT1
  • Shell - is an embellishment from the She Sells Sea Shells kit, which I fussy cut and then slicked on some Glossy Accents to make it stand out!
  • Ribbon - white organdie with a Satin Trim from my stash

I hope you'll come over to Incy Wincy Designs and look at the other gorgeous creations by my team mates and this month's Guest Designer Sandy together with our Special Guest Designer Annette. Then don't forget to come back and show us your creations featuring Ribbon, Twine or Fibres!


I would like to enter this card into the following challenge:

  • Challenge 14 - Case your Favourite Designer at As You Like It Challenges OK, this probably is not so much casing but more like stalking!!!! This designer's blog was one of the first I followed when I ventured into 'Blogland' and I am always totally blown away by her absolutely wonderful creations. I can only aspire to be able to create "gorgeousness" as well as she does, but now she has started making more C&S creations, I can at least attempt to be as creative as her! The designer I'm casing is ..... Annette 

Have a good week.
Hugs, Helen x

Monday, 28 October 2013

Attishoooo

Good morning friends and welcome to Monday. By the time this post goes live, I'll have been up for about 6 hours and will maybe have gone for an "early bird" swim too! The reason behind this? At the time of posting, eldest should be airbourne on her way west ... to New York City on a Geography Field Trip with school. We had to be at school at 4.45am - groans all round! Let's just hope that her flight doesn't get delayed.

Enough of the domestic notices! It's new challenge time at Lexi's Creations and this one is a great excuse to top up your "card boxes" as we'd like to see your creations for a Birthday Celebration.


Our sponsor for this challenge is our very own Lexi from Fairy Dust Crafts who will be letting our lucky winner choose 5 digital images from her store. Fairy Dust Crafts  is "Your one stop shop for Lexi's Digi images and a growing choice of delicious crafting goodies. Here you can find all Lexi's Creations digital images...also available as clear rubber stamps plus other crafting goodies in store now!"


As usual, Lexi has let us all loose in the store again (thanks Lexi) and here is my project featuring one of her cute images, using the current sketch at Bearly Mine Designs:


I'm sorry that this is a scan of my card - forgot to take a photo whilst it was daylight! Also, I've haven't put a sentiment on this card yet as I couldn't find one that said "One today" that I liked ... I shall have to keep looking on that front!


Anyway, my card recipe is follows:

  • Base Card - made from Centura Pearl in Snow White, which I cut scored and folded to make a 15cm square card
  • Design Papers - are from a kit called Patio Picnic by Summer at Summertime Designs
  • Image - this very surprised youngster is called Ellie Blowing Bubbles and she comes from the pen of Lexi at Fairy Dust Crafts. Ellie was cut out using the second largest Framelits Scallop Squares Die before being brought to life using my Spectrum Noir Pens (I think some of my pens may be having a protest about not being used for a while as they don't seem to be blending very well!) in the following colours:
    • Ellie - CG1, CG2, CG3, PP5, PP6
    • Bow - DR1, DR2
    • Bubbles - EB1
    • Outline - CG1
  • Sentiment -  none yet, but it will be for a First Birthday which my twin nieces will be celebrating in December
  • Ribbon - white organdie with a Satin Trim from my stash
I hope you'll come over to Lexi's Creations and add to your stash of Birthday Celebration cards along with us and this week's Guest Designers Kate and Silvi - this challenge ends on Saturday 9/11/2013.


I would like to enter this card into the following challenges:


Hope you have a great week.
Hugs, Helen x

PS: I'll bring more photo's later today, I hope!

Monday, 27 May 2013

It's all in the Words


Hello again friends!


It's new challenge time at Lexi's Creations and this fortnight our challenge is for you to Focus on the Sentiment. No images this week and the sentiment has to be the main focus of your creation which can be anything card, gift, ATC, scrapbook layout etc. 


Our sponsor for this challenge is Priyanka from My Heart Pieces who is offering a prize of 3 digis to our lucky winner - here's a little about her: 
Hi I am Priyanka from India, I am a student here. I want to welcome you in my wonder land My Heart Pieces. This art world is for me a wonder land, because what I can imagine I can give shape only here. Like fairy, vampire is not happen in real life. I greatly appreciate it that you give your valuable time to see my digis. I always try to keep an extra touch on my every images so they can make a place in your heart and can directly touch their heart who receive your hand made gifts. So come and enjoy. My store have an Challenge Blog and freebies every Monday.  


The lovely Lexi from  Fairy Dust Crafts has once again let us loose in her on-line store where there is a real treasure trove of goodies, not just digi-images! Here is my card this week featuring some of Lexi's work:


I've made this card for a work colleague who (with her husband) will shortly come to the end of the very long process of adopting a 5 year old girl. I wanted to give them a card that was a bit of a grown-up way of celebrating the expansion into a family!


My card recipe is as follows:

  • Base Card - made from Centura Pearl in Snow White which I cut and scored to make a 10.5cm spring card. Haven't made one of these for ages and I'd forgotten how good they look!
  • Design Paper - is by Summer at Summertime Designs and is from the Sweet Springtime kit. This gorgeous paper is called "Wild Flowers" and I love the varying shades of pink.
  • Sentiment - is by Lexi at Fairy Dust Crafts and is called Sugar 'n' Spice. I printed this into an oval shape which I cut out, and then ink distressed the edge of the oval using a Papermania Capsule Collection Pigment Ink Pad in Red Hot. I then coated this with Holographic Embossing Powder before heating it to give the whole thing a bit of sparkle - unfortunately the ink didn't take up the embossing powder very well!
  • Butterfly - is also by Lexi at Fairy Dust Crafts and this image is called DIY Butterfly. Perfect for this challenge as I paper pieced the image using the "Dark Pink Blossoms" paper from the Summertime Designs kit Sweet Springtime. I then dabbed my Versamark Ink Pad over the wings and liberally sprinkled them with Holographic Embossing Powder before heating it. Just check out the sparkle!!!!!!
  • Pearls - are from my stash and coloured using my Spectrum Noir Pen in shade PP6
  • Ribbon - surfaced from my craft things put aside for Guides but not used. It was a bumper bag of ribbon and cord offcuts priced 99p (!) I think from Hobbycraft.


I do hope you'll come over to Lexi's Creations during the next 2 weeks and see what my talented team-mates have made which Focus on the Sentiment. Don't forget to  come back and share your creations with us! You've got until Saturday 8th June to link your projects up.


I would like to enter this card into the following challenges:


Hope you have a great day!
Hugs, Helen x

Monday, 20 May 2013

Watching the Flowers Grow ...

Good morning friends - I hope you are well. I'm not sure what has happened to the UK weather this last week, but it seems as though Spring has turned her back on us!!!


It's new challenge time at Whoopsi Daisy and this week we're really hoping that Spring has sprung as we'd like to see your May Flowers ... just in time for the first RHS Show of the season, Chelsea Flower Show! Those of you who are so talented at embellishing your projects with beautiful flowers will love this challenge ... for me this was more than a slight challenge!


As usual, Linnie is offering our lucky prize winner one sheet of images from the Whoopsi Daisy Store, unless you've used a Whoopsi Daisy Image for your project in which case you can choose two sheets of images. Linnie invited the DT to peruse the store again, but I chose to use this sweet image which was a freebie on the store blog, I think last summer (although if anyone knows better, please let me know!)


My project recipe is as follows:

  • Base Card - made from Centura Pearl in Snow White which I cut and scored to make a 15cm square card
  • Design Papers - are both from a collection called Emma's Garden which was a magazine freebie. I've edged this with a deep raspberry coloured border which I've tool distressed
  • Image - as I've said, this beautiful image was a freebie last year, and it's called Girl and Butterflies. I brought this idyllic scene to life using my Spectrum Noir Pens and chalks in the following colours:
    • Skin - FS2, FS3
    • Hair - GB7, GB8
    • Top -  BP1, BP2
    • Trousers - EB2, IB1, IB2, IB3
    • Hat - EB1, EB2
    • Butterflies - IB2, GB1
    • Flowers - CG3, GB4, BP5, BP7
    • Background - Craf-T Chalk in Light Blue, Dark Brown, Light Brown, Dark Green and Green 
  • Sentiment - is by Paulette at Create with TLC and I think this Happy Birthday Flag has to be one of the sentiments I use most regularly. I changed the colour of the sentiment by taking in into my word processing programme and recolouring it to one of the shades of blue so it fitted in with the card.
  • Flowers - were made by taking a floral patterned sheet from  Emma's Garden Collection and punching the flower shapes with my flower punch. Once the shapes were adhered to the card, I then stuck Gems from stash onto them to "bling" them up a bit!
  • Ribbon - is a thin pink organdie ribbon from my stash (originally from a local haberdashery store). I used 2 strands which I twisted together a couple of times in the middle to give the unusual style.

I do hope you'll come over to Whoopsi Daisy Challenge and have a look at the wonderful floral creations made by the Divas. Then come back and show us your projects featuring May Flowers. Don't forget that if you're using a Whoopsi Daisy image then you don't have to follow this week's theme!!! This challenge closes on Sunday 26th May 2012.


I would like to enter this card into the following challenges:


I'll be back later this week with some more DT projects. In the meantime, have a good day!

Hugs, Helen x

Tuesday, 14 May 2013

Fiesta, not Siesta!


Photobucket
Good morning all from a very excited Casa de Crafty Mamma Mia. Why, I hear you ask? Well today is the start of my 4 week residency as Guest Designer at Top Tip Tuesday ... thanks for having me girls!!!!


Today is my  first challenge with the team, and the title of this one is Box Clever - this means make any kind of box. Our sponsor for this challenge is the lovely Melissa at MelJen's Designs who will be giving a great prize to the lucky winner of this challenge. Don't forget that you too could feature as a Top Tip Tuesday Guest just by leaving a great tip! 


Melissa has been kind enough to provide the DT with some images to showcase, and here is my box featuring one of Melissa's 'furry friends':


My project recipe is as follows:

  • Box Base - made from Centura Pearl Card in Dark Chocolate which I cut to 10.5cm x 29.6cm (half an A4 sheet longways) and then scored using my Ultimate Pro to make the Wedge Box shape
  • Design Paper -is by Paulette at Create with TLC and is called Fiesta Time. This was a goodie on Paulette's blog just last week as Paulette was celebrating Cinco Mayo ... the timing couldn't have been more perfect!
  • Image - this hot dog is Chili Chihuahua and he is one the cute animal images you can get from  MelJen's Designs. I used the "out of the box" technique with the smallest rosette from the "nest" on the Ultimate Pro Embossing Board Springtime Sweets and Cupcake Treats - rather like a die, as I don't have a die-cutting machine. However, I find this technique works just as well, even if it's slightly more time consuming! I de-bossed the rosette shape around the image before cutting it out and bringing this canine cutie to life using my Spectrum Noir Pens in the following colours:
    • Sombrero - CT2, CT3, CT4, TB5, JG2, CR9, CR10, CR11
    • Chihuahua - TN3, TN4, TN5, PP2, PP3
    • Poncho - JG1, JG2, TB5
    • Chillis - CR9, CR10, CR11
    • Outline - GG1
    • Background - Craf-T Chalk in Light Blue and Bronze Gel Pen
  • Ribbon - was recycled having been cut from one of my daughter's jumpers! (Does anyone hook these lengths of ribbon over coat hangers when hanging a garment?)  


I think this box would be great for small Birthday presents (like make-up or hair bits that teenage girls tend to  give each other) or in a different size as Wedding favour boxes ... and it was oh so easy to make too!


I hope you'll come over to Top Tip Tuesday and see the wonderful Boxes made by the rest of the DT - we'll be back with our mid-challenge inspiration next Tuesday.


I would like to enter this project into the following challenges:

Hope you have a great day,
Hugs, Helen x