Monday, 29 April 2013

This is "Whaley" good!

This is my second post of the day - please scroll down for my first post

Good evening friends and a slightly later post than normal from me with the new challenge from  Incy Wincy Designs. This week we want to see your creations featuring Ocean Animals.


We're sponsored this week by the wonderful Melissa at Meljen's Designs, who has kindly provided some images for the DT to showcase this week as well. Thank you Melissa!


So here is my card for you:


My card recipe is as follows:

  • Base Card - made from Centura Pearl in Turquoise (mine came in a Brights pack from Crafter's Companion which they don't seem to have on their web site any more). This was I cut, scored and folded to make a 15cm square card.
  • Design Papers - are all by Summer at Summertime Designs and they come from her kit Relax. I tried to use colours and shapes that evoked the sea and wave movements. From the bottom layer, the papers I've used are called Stripes, Turquoise, Paisley and Lime Circles. I have digitally matted and layered these papers together using a khaki/tan outline in my word processing programme. The letter tiles are also part of this kit, and I imported them individually into my word processing programme as well and layered them up onto the Lime Circles paper. I had to do a bit of nifty cutting with my craft blade around the "K" so that I could tuck the card rectangle underneath it!
  • Image - this beautiful image is called Mamma Whale by Melissa at Meljen's Designs. At the moment this tender image is on half price sale, so why not treat yourself? I brought these 2 giants of the oceans to life using my Spectrum Noir Pens in the following colours before gently tool distressing the edge.
    • Mamma Whale - IB2, IB3, TB4, PP4
    • Whale Calf - IB1, IB2, IB3, PP4
    • Swirls - GT2
    • Heart - PP4
    • Outline - GT1
  • Sentiment - is, of course, by Paulette at Create with TLC ... who else can come up with such cracking sentiments? I got this one from Paulette in May 2012 - I think it was a freebie on her blog.

I do hope you'll head over to Incy Wincy Designs this week and see the other wonderful layouts from my very talented team-mates and Valou - it's her last week as our Guest Designer and she has made some wonderful creations, so please head over to her blog and leave her some love. Then come back and show us your creations featuring Ocean Animals. This challenge closes on Sunday 5th May.


I would like to enter this card into the following challenges (with a little help from the girls at Feline Playful - thank you!):


Hugs, Helen x

Sshhhhhh ... it's a secret!

This is my first post of the day - please scroll up to see my second post

Good morning friends and I hope you are well.


This morning sees the start of the new fortnight's challenge at  Lexi's Creations. This one's nice and simple as  Susan is simply asking us to celebrate a Happy Birthday. No excuses for not coming over and joining us this week!

This week's sponsor is Priyanka from My Heart Pieces who is offering a prize of 3 digis to our lucky winner and the lovely Lexi from  Fairy Dust Crafts has kindly allowed the DT their choice of image from her store.


I've added another new fold to my armoury this week, and here is my card featuring one of Lexi's really lovely sentiments:


My card recipe is as follows:

  • Base Card - made from 2 sheets of 120gsm card in Cream which was cut, scored and folded to make a Lever Card following this tutorial at SplitCoast Stampers.
  • Design Papers - are both from a pack called Fabrications by Teresa Collins which was a freebie in this month's Cardmaking & Papercraft magazine. I've used the papers in olive green and red, both with a damask style pattern on them, which lend a vintage style to the card.
  • Image - this beautiful girl is called Ragdoll Sweetheart Tssss and she was a freebie from Olga at Little Blue Button Stamps earlier this month. I've brought this cutie to life using my Spectrum Noir Pens in the following colours:
    • Flesh - FS1, FS2
    • Hair - GB8, GB10
    • Dress - GB3, GB4, GB5
    • Cupcake - EB1, CR11, DG3, Silver Gel Pen
    • Hat - CR11, DG3 Silver Gel Pen
    • Outline - BT1
    • Edge Distressing - Chalk in Light Brown
  • Pearls - from my stash
  • Sentiment - this beautiful swirly sentiment (also evocative of a by-gone era) is by Lexi at Fairy Dust Crafts. I also distressed the edge of this in the same Light Brown Chalk.


I hope you'll come over to Lexi's Creations and see how my talented teamies and this week's Guest Designer are saying Happy Birthday and then come back and share your creations with us! You've got until Saturday 11th May 2013 to link your cards up.


I would like to enter this card into the following challenges (with a little help from the girls at Feline Playful - thanks!):


Hugs, Helen x

Tuesday, 23 April 2013

With Red and White Love!

Hello friends and happy St. George's Day to my English followers!


It's been a glorious day here on the south coast of the UK - the sun's still out, there are a few clouds in the sky, I've had a line full of washing ... the only damper is that is that the clothes will need ironing later! Still, at least it seems we've got a spell of warmer weather. Just hope this isn't our summer :o)!!! I hope the weather is just as nice in your area. Welcome to Jackie, my newest follower - hope you enjoy this crafting journey!


Well, with apologies to the team, I'm a day late with this post. Yesterday saw the start of a new challenge at Whoopsi Daisy, and our theme for you this week is Use a Circle on your Creation.


Our lucky winner's prize is (as usual) one sheet of images from the Whoopsi Daisy Store, unless you've used a Whoopsi Daisy Image for your project in which case you can choose two sheets of images. Linnie has let us all loose in her store again, and if you haven't visited in the last couple of weeks, now would be a good time to go. Not only are there some beautiful new images there (including my favourites 'the misses'!) but there's also a really sweet freebie there for you.


For my card this week, I've used the current sketch at Chocolate, Coffee & Cards and have also been inspired by the St. George's Colour Combo of Red and White at Ladybug Crafts Ink, and here is my card for you:


My card recipe is as follows:


  • Base Card - is Centura Pearl in Snow White which I cut, scored and folded to make a 12cm square card.
  • Borders - have been embossed using the Bubbles border on my Ultimate Pro Embossing Board Teddy Surprise and Butterflies directly onto my base card. I wanted to make it appear as though one of the border was on top of the other (as per the sketch) and actually embossed it like this. However, I think I'll need to have a re-think on this technique, as it hasn't worked!!!!!
  • Design Paper - is Paper 1 and it's from a mini scrapping kit called Only You by Studio Basic Designs at Sweete Shoppe Designs. I've taken the paper into my word processing programme, and superimposed a circle with a broad line over the paper, to give the impression of a matted layer.
  • Image - is of course by Linnie from Whoopsi Daisy and she is a pre-coloured image from Sheet 444. She's one of the newer images that Linnie has created in her range of older girl images. She shares the sheet with herself as a line drawing, and also with the girl I used in my post Très Chic earlier this month who also comes as both a line drawing and pre-coloured image. I've put this "lovely" in a circle with a broad line around it.
  • Pearls - are from my stash and are coloured using my Spectrum Noir Pen in shade DR3

Do come over to Whoopsi Daisy Challenge and have a look at what the other talented Divas have made for your inspiration which feature "Circles on your Creation". Don't forget to come back and show us your projects - you've got until Sunday 28th April to link your creations up. And don't forget, as usual, if you use a Whoopsi Daisy image then you don't have to follow this week's theme!!!


I would like to enter this card into the following challenges:

Hope you enjoy your week.
Hugs, Helen x

Monday, 22 April 2013

Yummy!!!!!!!!!!!!!!


Hello again everyone!


It being Monday morning, it's time for a new challenge at  Incy Wincy Designs and this time we've got a Sketch Challenge for you. DT member Karen has come up with this lavishly layered layout for us all to use. Please feel free to flip or rotate the sketch ... as long as we can still see it's our layout, we'll be happy!


We've got 2 awesome sponsors lined up for you again this week:


Our first sponsor is the team at Digital Delights who are offering one lucky winner 3 digital images. I love the new musical set release - you could compile your own digi band with the lovely images!


Our second sponsor is our very own DT Member Nikki who runs Limited Runs Digital Stamps. Nikki has a "Freebie Friday" every week so do head over to her blog and check out her digis. 


I've always admired those who put such wonderful stitching on their multi-layered cards. However, as I put my layout together digitally, I was never going to be able to stitch this lot and get the layers right. I don't know if there are any tutorials out in Blogland showing "Digital Stitching", but I thought I would put together a brief tutorial on how I did it.

Materials:
Digital Papers (see below for details of the digi papers I'm using)
Word Processing Program on your computer - I use Microsoft Word on a PC and I'm not sure if my tutorial will work for all computers.

How to insert Digital Faux Stitching:


Choose your digi papers and a layout that you like. Layer up your papers in the order you want them to appear on your card and at the right size that you want them to be when they're printed out. My base layer here is 14cm square to go on a 15cm square card.
If you're a beginner in layering digital images, I can recommend that you follow this tutorial by my bloggin' buddy Annette who explains the "How to ..." very clearly! Once you've got your papers layered up, with a picture border as the faux matting layer....


Choose the "Insert" tab and select "Shapes". From that drop down menu, choose the "Rectangles" shape and click on it. 


Draw a rectangle (or whatever shape you need) inside the shape of your first paper layer. Here you can see a yellow rectangle with a red border on top of my blue paper, which is the top layer of my stack. How close you put the rectangle to the edges of your paper depends on how close you want the stitching to be to the edge of the paper.


Click on the "Format" Tab and click the "Shape Fill" option; then click on "No Fill". As you can see in the picture above, the yellow rectangle has gone, and the blue DP is visible with a red border on the inside edge.


Click on the "Format" tab again but this time click on the "Shape Outline" option - you can choose how heavy your line is by clicking on the "Weight" option and then choosing one of the preset options. Here I've chosen 2¼ points.


Go back and click on the "Format" tab and click on the "Shape Outline" option again. This time select the "Dashes" option and you can choose from the pop-out box of options what style you want your "stitching" to be. Here I've selected the "Long Dash Dot Dot" line. If you look closely at the blue paper, you can see that our choice of "stitching" is already showing on it.


Now to colour the "stitching" - click on the "Format" tab and click on the "Shape Outline" option once more. This time, choose a colour from the colour palette which is shown - I've gone for the same mid-grey shade to match my faux matting layer. Again, look closely at the blue paper, and you can see that the "stitching" lines are now in our chosen colour.


I like to group the paper and the "stitching" line see through shape together - that way, if they get moved they will stick together! Left mouse click on the "stitching" line and then hold down the Shift key. Keeping this key depressed Right mouse click on the blue digi paper - this should bring up a menu. (If your 2 shapes are very close together, this might take several goes to get right!) Use the mouse to highlight the "Group" option. This should bring out a little pop-out box and you can now release the Shift key. Select the "Group" option and your "stitching" is now on top of the blue digi paper.


I like to put this layer at the back, so that I can work on all the other layers. So, right mouse click on the blue digi paper, use your mouse to select the "Send to Back" option. This will generate another pop-out box, and you will need to use your mouse to select the "Send to Back" option from this box.


You can see that the blue paper has now disappeared leaving the formatting outline on top of the paper stack. This will disappear as soon as click away from the papers.


For each remaining layer of digi paper that you want stitching on, follow the above instructions and then send that layer to the back. By the time the bottom layer (here the stripy paper) has got it's faux stitching and been sent to the back, the stack of papers is all in the right order again, as shown in the picture above. All that remains to be done is to print it out and attach it to your card base.


Nikki very kindly gave each DT member their choice of one image to showcase, so here is my card featuring one of Nikki's Limited Runs Digital Stamps and the layered and "stitched" paper stack shown in the tutorial with two extra layers physically added for the image and the sentiment:


My card recipe is as follows:

  • Base Card - made from Centura Pearl in Snow White which I cut, scored and folded to make a 15cm square card.
  • Design Papers - are all by Summer at Summertime Designs and they come from her new kit Patio Picnic. From the bottom layer, the papers I've used are called Stripes, Green Patterned, Pink Flourish, Pendant and Blue Flourish. I have digitally matted and layered these papers together using a dove grey outline in my word processing programme, so there will be little bulk to this card. Using the tutorial process, I also used to my word processing program to insert faux stitching on every layer in the same dove grey colour. 
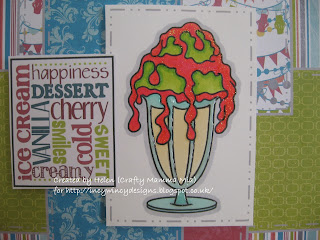
  • Image - this mouthwatering image is called Ice Cream Sundae and it has been drawn by Nikki at Limited Runs Digital Stamps. I brought the sundae to life using my Spectrum Noir Pens in the listed colours before slicking a layer of Glossy Accents over the Sundae Glass, and sprinkling a layer of Holographic Embossing Powder over the sauce and heat setting it:

    • Sundae Glass - BT2, BT4
    • Ice Creams - EB1, EB2, CG2, CG4
    • Sauce - DR1, DR3
    • Outline - IG2
  • Sentiment - this Subway Art style sentiment is by Paulette at Create with TLC. I got this from Paulette in February 2012 - I can't remember whether it was a blog freebie, or whether it was a Scavenger Hunt prize ... sorry! Whichever it was, it's perfect for this card!


I do hope you'll head over to Incy Wincy Designs this week and see the other wonderful layouts from my very talented team-mates and Valou who is still with us as our Guest Designer. Then come back and show us your creations which follow our Sketch. This challenge closes on Sunday 28th April.


I would like to enter this card into the following challenges:

  • Just Add Glitter Recipe Swap at Catered Crop
  • Challenge 59 - Food Glorious Food at Little Miss Muffet
  • Challenge 99 - Say It Isn't Sew (No Machine Sewing) at Top Tip Tuesday My tip for you this time is how to put digital faux stitching on your card using the Tutorial above

Hope you have a great week.

Hugs, Helen x


Saturday, 20 April 2013

Easy on a Sunday Morning

Hi Friends!

I hope you're enjoying your Saturday - we've got blue sky, some 'cotton wool' clouds and it's a lovely day! I'd like to welcome Julie who is my newest follower - thanks for sharing this journey!


I want to share a card with you that I've made for my Dad's birthday tomorrow. It's OK - my Dad doesn't know about my blog, so I'm quite safe posting this up! :o)  I've used the current sketch at Tuesday Morning Sketches for my layout, only I've flipped the sketch.


My card recipe is as follows:

  • Base Card - is a pre-made A5 card blank in Kraft
  • Design Papers - are all by Summer at Summertime Designs and they come from a kit called Fathers and Fedoras. The base layer is called Random Blue Paper, the banner is made from Stripes Paper, and the top layer of paper is called Grunge Paper.
  • Image - this idyllic Sunday scene is a rubber stamp (I know, I can stamp too!!!!!!!!!) which I won a couple of years ago from Little Claire's Designs. It's called, not surprisingly Sunday Morning and this is only the second time it's been inked ... shame on me! I brought the image to life using my Spectrum Noir Pens in the listed colours before using the "out of the box" technique with the smallest rosette from the "nest" on the Ultimate Pro Embossing Board Springtime Sweets and Cupcake Treats to de-boss the shape around the scene. By de-bossing, I could see where the tool was, and knew just when to stop and then start again leaving the table legs, parts of the radio and the top of the cafetiere outside the shape.

    • Radio - TB2, TB3, TB4, TB9, Silver Gel Pen
    • Cafetiere - EB2, EB8, BT1, Silver Gel Pen
    • Mug - EB1, EB2
    • Table - TN3, TN4, TN5
    • Book - DG1, DG2
    • Sign - DG2
    • Glasses - Silver Gel Pen
    • Outline - GG1
  • Sentiment Ticket - is by Debbie at The Crafty Pad Designs (available from Card Making Downloads). This ticket is called Happy Birthday Plain Style. I coloured it using my Spectrum Noir Pen in TB2 and Silver Gel Pen so it goes with main colours of the card and image.


I would like to enter this card into the following challenges:

I hope you have a great weekend, and I'll be back on Monday with my regular DT posts - see you then!


Hugs, Helen x


Monday, 15 April 2013

Nestled among the Flowers

This is my second post of the day - please scroll down to see my first post

Hello again friends! The weather hasn't been too bad down here over the weekend - Saturday was wet, wet, wet but yesterday was warm, we had some sunshine and only a few spots of rain. Consequently we got quite a few outdoor jobs done.

Anyway, today sees the start of a new challenge at  Lexi's Creations. This time Susan is asking us to  Add Either Ribbon or Lace. She has asked that whatever haberdashery you use, it has to be an integral part of your design. Fingers crossed that I've done that! I have been casting my mind (and computer files!) back, and I can't believe this is the first anniversary of my appointment to the DT at Lexi's Creations. I still love Lexi's digis now as much as the first day I started using them ... I hope that you are all enjoying seeing these gorgeous designs.


Our sponsor for this challenge is our very own Lexi from Fairy Dust Crafts who will be letting our lucky winner choose 5 digital images from her store. Fairy Dust Crafts  is "Your one stop shop for Lexi's Digi images and a growing choice of delicious crafting goodies. Here you can find all Lexi's Creations digital images...also available as clear rubber stamps plus other crafting goodies in store now!" Well worth a visit.

As usual, Lexi has very kindly let the DT loose in her on-line store and here is my card for you featuring one of her gorgeous images:


My card recipe is as follows:


  • Base Card - is Centura Pearl in Ivory, onto which I've embossed the largest flower shape from the "nest" on the Ultimate Pro Embossing Board Springtime Sweets and Cupcake Treats. I scored a fold line at the top of the flower leaving 2 petals at the bottom for "feet", and then cut this die-like shape out before folding it and cutting the back of the card out.
  • Design Paper - is from a brand new set by Donna at Bearly Mine Designs called Floral Surprise. This is a beautiful collection of papers and I must confess I fell in love with this floral paper over text on the set preview, and that's why I bought the set! I carefully embossed the medium flower shape from the "nest" on the Ultimate Pro Embossing Board Springtime Sweets and Cupcake Treats onto the paper, ensuring that the flowers and hummingbird were  in the bottom corner of the flower shape, before cutting it out and mounting it onto my base card.
  • Image - is by Lexi from Fairy Dust Crafts and is called Brooke - Thinking of You. I have brought this dreamy girl to life using my Spectrum Noir Pens in the following colours:
    • Skin - FS2, FS3, CR4
    • Hair - GB8, GB10
    • Top and Shoes - GB3, GB4
    • Trousers - GG1, GG2
    • Cushion - DR1, DR5, DR7
    • Outline - IG1
  • Flower and Rosette - I used my Flower Punch, a yellow flower paper from the Bearly Mine Designs kit Floral Surprise and some lace to make the flower following this tutorial by my former Crafty Pad teamie Leesa. I replaced the second and fourth paper layers with some lace. Once my flower was dry, I made a lacy rosette from the same lace (from my local haberdashery store) and mounted the flower onto the rosette, and then attached them to my card. It's the first time I've tried this technique, and I must confess that the lace soaked up the glue and has become rock hard, rather than the floaty layers I was hoping for! :o) I'll keep trying!

I have deliberately left this card sentiment free - I think it would be great as a Thinking of You card, but would do equally well as a Thank You or Birthday card. So, it's going into my "done box" awaiting it's occasion!


I hope you'll come over to Lexi's Creations and see how my talented teamies and our Guest Designer Yogi have used their Ribbon or Lace. Don't forget to come back and share your creations with us! You've got until Saturday 27th April 2013 to link your cards up.


I would like to enter this card into the following challenges:


I hope you have a great week - let's hope the weather continues to be dry and warm!

Hugs, Helen x

Penguin Love


This is my first post of the day - please scroll up to see my second post

Good morning friends! I hope you are well, and if you had time off over the Easter holidays I hope you had fun - just a shame the weather wasn't brilliant! It's back to being beckoned out of bed by the alarm again this morning as my 2 week Easter break from school is over. I'd like to extend a very warm welcome to my 2 newest followers, Jenny and Katie - welcome aboard this crafting journey!

It being Monday morning, it's time for a new challenge at  Incy Wincy Designs and this time our challenge is Feathers or Fur! All you've got to do is feature either a feathery or furry friend on your project!


We've got 2 awesome sponsors lined up for you this week:


Our first sponsor is the wonderful Teri at Delicious Doodles and she is offering our first lucky prize winner 4 "Yummy Digital Images" from her On-line Store.


Our second sponsor is the team at Cedar Chest Designs who are offering our second lucky prize winner a $10 Gift Certificate to their On-line Store.


The DT has been given some images from both sponsors to showcase this week, and here is my card featuring an image you can find at Cedar Chest Designs:


My card recipe is as follows:

  • Base Card - made from Centura Pearl in Snow White which I cut, scored and folded to make a 15cm square card.
  • Design Papers - are all by Summer at Summertime Designs and they come from the Winter Wonderland kit. The bottom layer is called Dark Blue Blizzard Paper, the middle layer is called Circle Dots Paper, and the top layer is called Falling Paper. I have digitally matted and layered these papers together using a dark brown outline in my word processing programme, so there will be little bulk to this card. 
  • Border - following some very careful measuring (and lots of testing on scrap paper!) I used my Snowflake Punch to create this border. I have used a strip of Dark Blue Paper (from the Winter Wonderland kit) to go behind the border, just to make the snowflakes stand out a bit more.
  • Image - this cute image is called Penguin with Heartstrings and it is by April, one of the artists at Cedar Chest Designs. I brought my little feathered friend to life using my Spectrum Noir Pens in the following colours:
    • Penguin - EB1, True Black, Colourless Blender, OR1
    • Hat & Scarf - BT7, BT9, EB7, EB8
    • Hearts & String - Silver Gel Pen
    • Outline - BT1
  • Sentiments - is by Paulette at Create with TLC and this piece of word art was included in the December 2012 "Club". I've superimposed this onto a tag from the Winter Wonderland kit before punching the hole through and attaching some Twine from my stash.


I do hope you'll head over to Incy Wincy Designs during this week and see the other creations featuring Feathers or Fur which have been made my my Teamies and this week's Guest Designer Valou. Don't forget to come back and show us your creations; you've got until Sunday 21st April 2013 to join in.


I would like to enter this card into the following challenges:

Hugs, Helen x